


Hello All. Hope you all are well and good. Today, I will tell you how to insert a record in read-only Oracle JET Table.
In Oracle Visual Builder Cookbook's Table, you will see that, in the table, the data is getting populated either using JavaScript or it can also be populated using Business Object. And if you want to know more about Editable Table functionality then you can either refer to cookbook or you can check Satish Kumar blog.
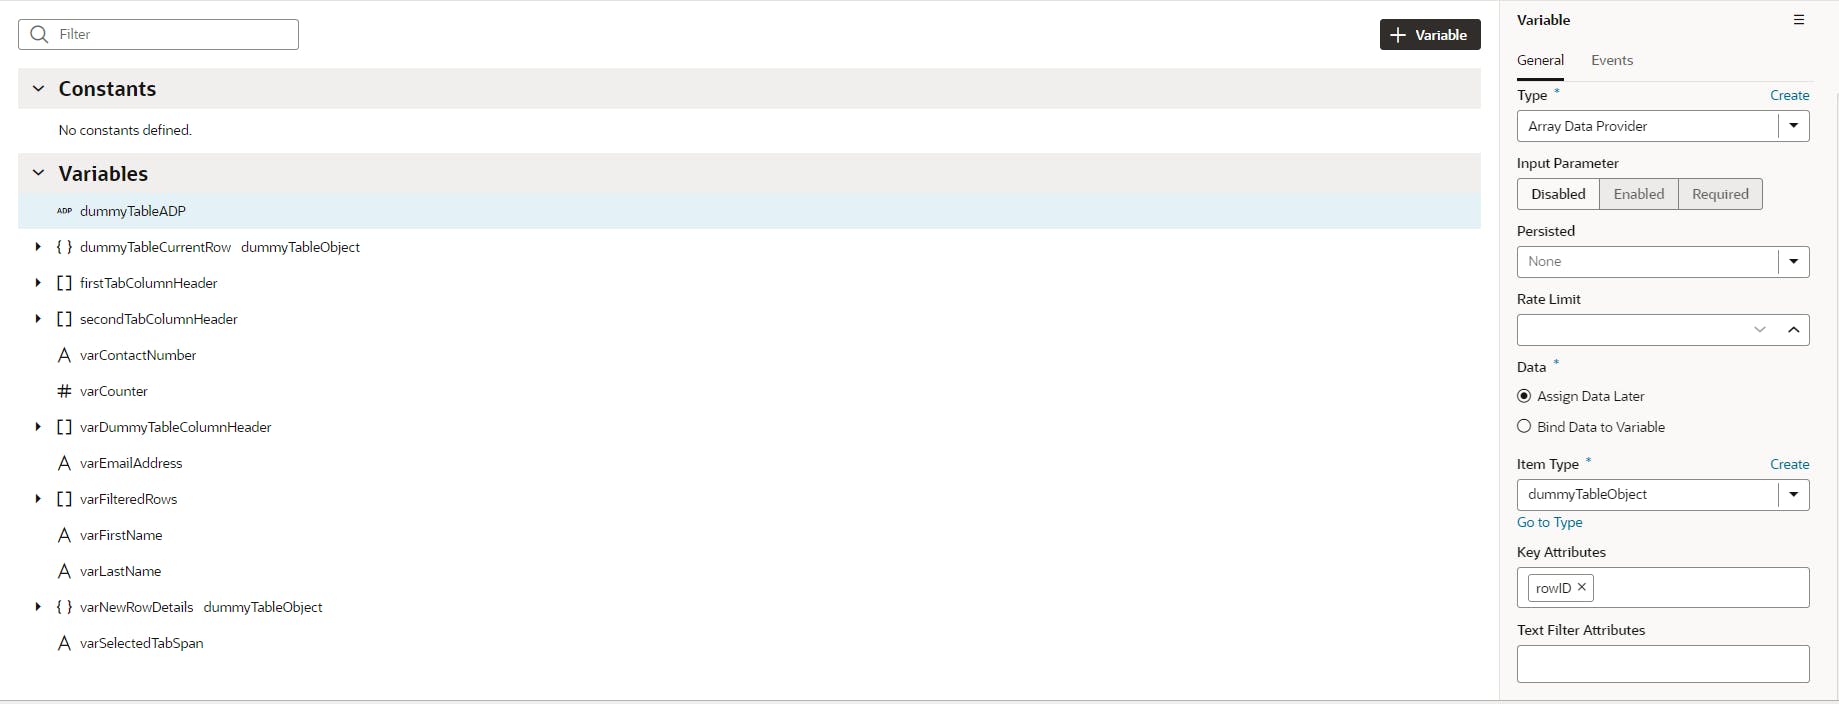
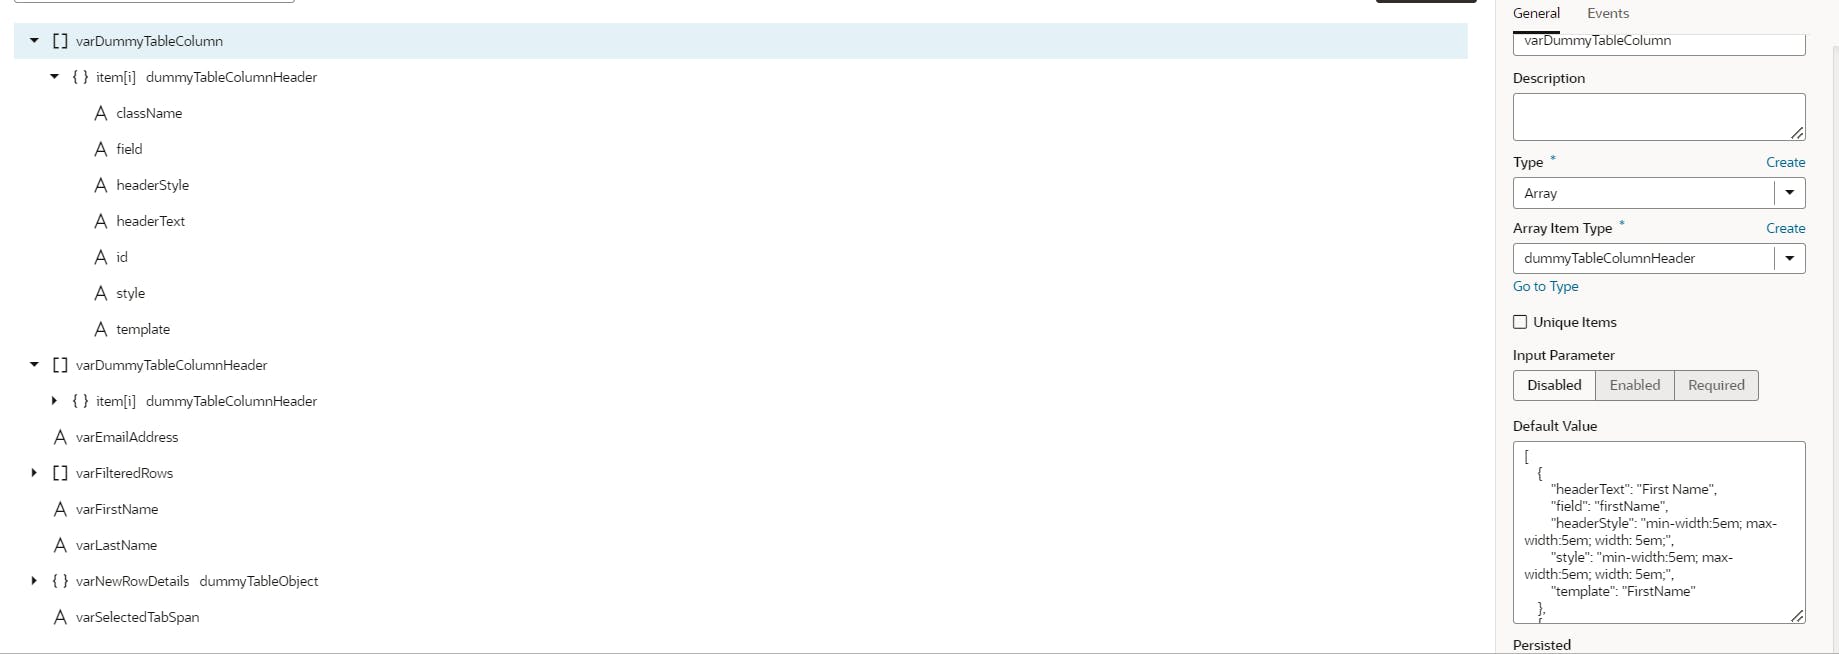
Here, I will show you how to insert a new record in a blank OJET table. To start with, we will first create a custom type for our table ADP. In this type, we will create fields like First Name, Last Name, Contact Number, Email ID, Department etc. and we will map this custom type to our dummTableADP Array Data Provider type variable. Create two more object type variable using the same custom type. Create another variable of array of object type and add properties and styling scripts as shown below in 3rd screenshot. This variable will be used in our JET table.

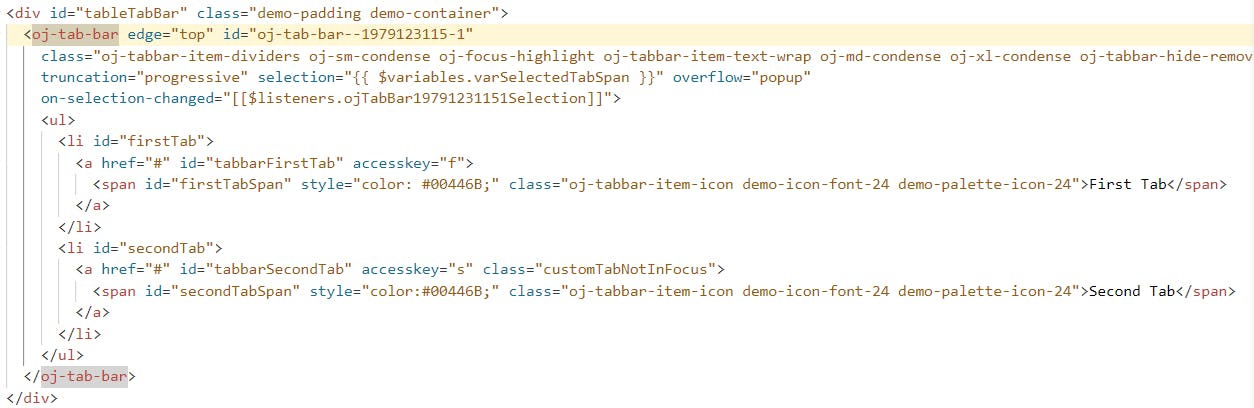
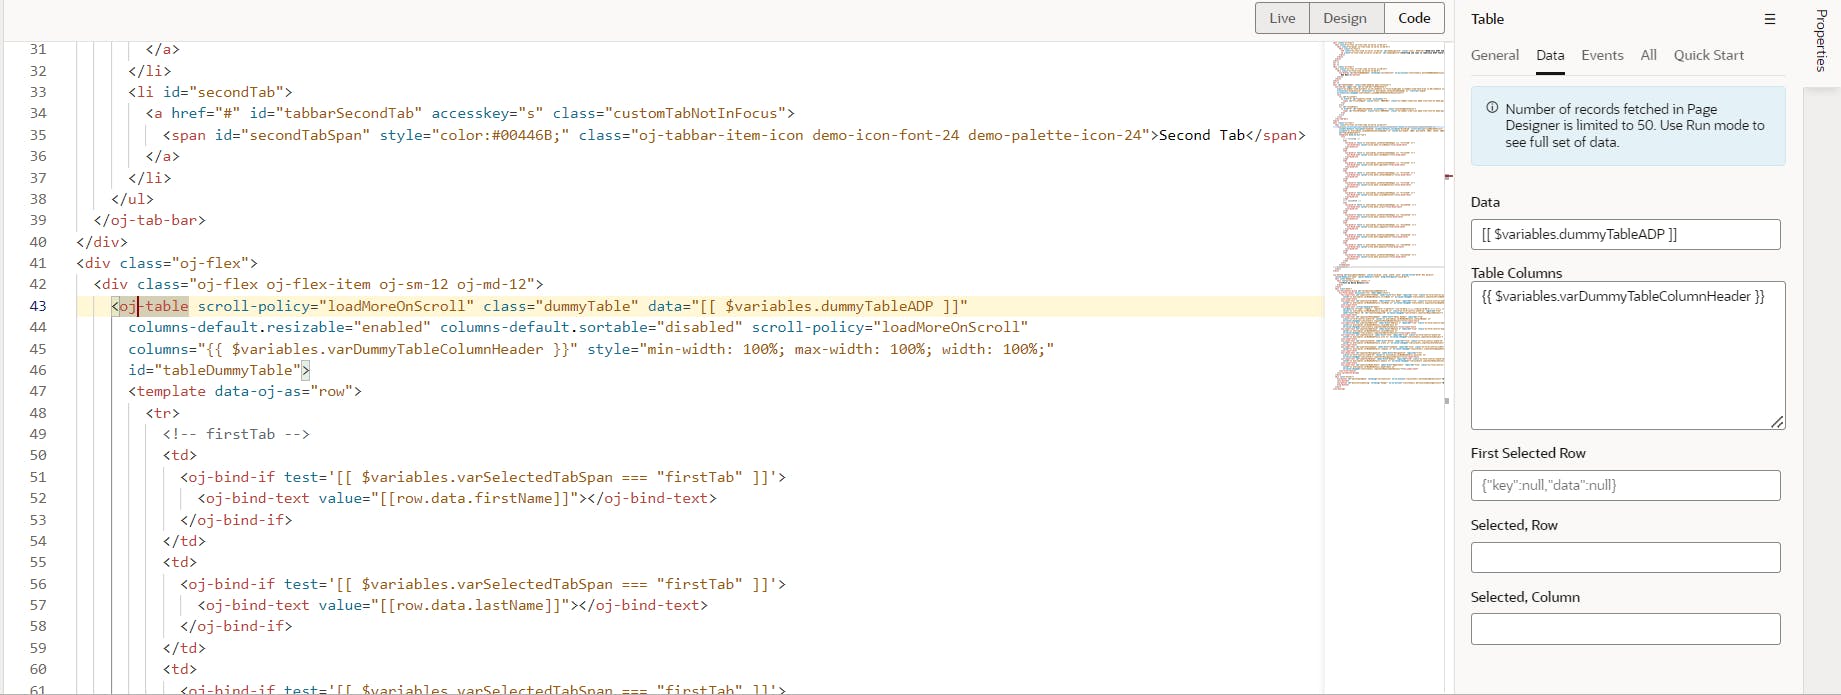
In the page designer, add a JET button, a JET Tab-bar and a JET Table as shown below. First, map a variable to JET Tab-bar's selection property. Next, Map data property of JET Table with above ADP type (DummyTableADP) variable and columns property with above array of object type (DummyTableColumn) variable.
Once this is done, we have to tell JET table which columns it has to populate for each tab and what data should be populated in each column. To do that, use template property as shown below for all columns.

<oj-table scroll-policy="loadMoreOnScroll" class="dummyTable" data="[[ $variables.dummyTableADP ]]"
      columns-default.resizable="enabled" columns-default.sortable="disabled" scroll-policy="loadMoreOnScroll"
      columns="{{ $variables.varDummyTableColumnHeader }}" style="min-width: 100%; max-width: 100%; width: 100%;"
      id="tableDummyTable">
    <template slot="FirstName">
       <oj-bind-if test='[[$variables.varSelectedTabSpan==="firstTab"]]'>
        <oj-bind-if test'[[$current.mode==="navigation"]]'>
            <oj-bind-text value="[[ $current.data ]]"></oj-bind-text>
        </oj-bind-if>
       <oj-bind-if>
    </template>
    <template slot="LastName">
       <oj-bind-if test='[[$variables.varSelectedTabSpan==="firstTab"]]'>
        <oj-bind-if test'[[$current.mode==="navigation"]]'>
            <oj-bind-text value="[[ $current.data ]]"></oj-bind-text>
        </oj-bind-if>
       <oj-bind-if>
    </template>
    <template slot="EmailID">
       <oj-bind-if test='[[$variables.varSelectedTabSpan==="firstTab"]]'>
        <oj-bind-if test'[[$current.mode==="navigation"]]'>
            <oj-bind-text value="[[ $current.data ]]"></oj-bind-text>
        </oj-bind-if>
       <oj-bind-if>
    </template>
    .
    .
    .

    <template slot="City">
       <oj-bind-if test='[[$variables.varSelectedTabSpan==="secondTab"]]'>
        <oj-bind-if test'[[$current.mode==="navigation"]]'>
            <oj-bind-text value="[[ $current.data ]]"></oj-bind-text>
        </oj-bind-if>
       <oj-bind-if>
    </template>
    <template slot="State">
       <oj-bind-if test='[[$variables.varSelectedTabSpan==="secondTab"]]'>
        <oj-bind-if test'[[$current.mode==="navigation"]]'>
            <oj-bind-text value="[[ $current.data ]]"></oj-bind-text>
        </oj-bind-if>
       <oj-bind-if>
    </template>
</oj-table>
In case, if you are not comfortable with above approach, then you can also follow below approach which is mentioned in Cookbook Editable Form Table in Oracle JET
<template slot="rowTemplate" data-oj-as="row">
                <tr>
                  <!-- ko if: row.mode === "navigation" -->
                  <td>
                    <oj-bind-if test='[[ $variables.varSelectedTabSpan === "firstTab" ]]'>
                        <oj-bind-text value="[[ $row.data.firstName ]]"></oj-bind-text>
                    </oj-bind-if>
                  </td>
                  <td>
                    <oj-bind-if test='[[ $variables.varSelectedTabSpan === "firstTab" ]]'>
                        <oj-bind-text value="[[ $row.data.lastName ]]"></oj-bind-text>
                    </oj-bind-if>
                  </td>
                  <td>
                    <oj-bind-if test='[[ $variables.varSelectedTabSpan === "firstTab" ]]'>
                        <oj-bind-text value="[[ $row.data.emailID ]]"></oj-bind-text>
                    </oj-bind-if>
                  </td>
                  .
                  .
                  .

                  <td>
                    <oj-bind-if test='[[ $variables.varSelectedTabSpan === "secondTab" ]]'>
                        <oj-bind-text value="[[ $row.data.city ]]"></oj-bind-text>
                    </oj-bind-if>
                  </td>
                  <td>
                    <oj-bind-if test='[[ $variables.varSelectedTabSpan === "secondTab" ]]'>
                        <oj-bind-text value="[[ $row.data.state ]]"></oj-bind-text>
                    </oj-bind-if>
                  </td>
                  .
                  .
                  .
Note: in both of the above examples, the three dots "..." signifies that you have continue with adding templates and/or td elements for each columns.
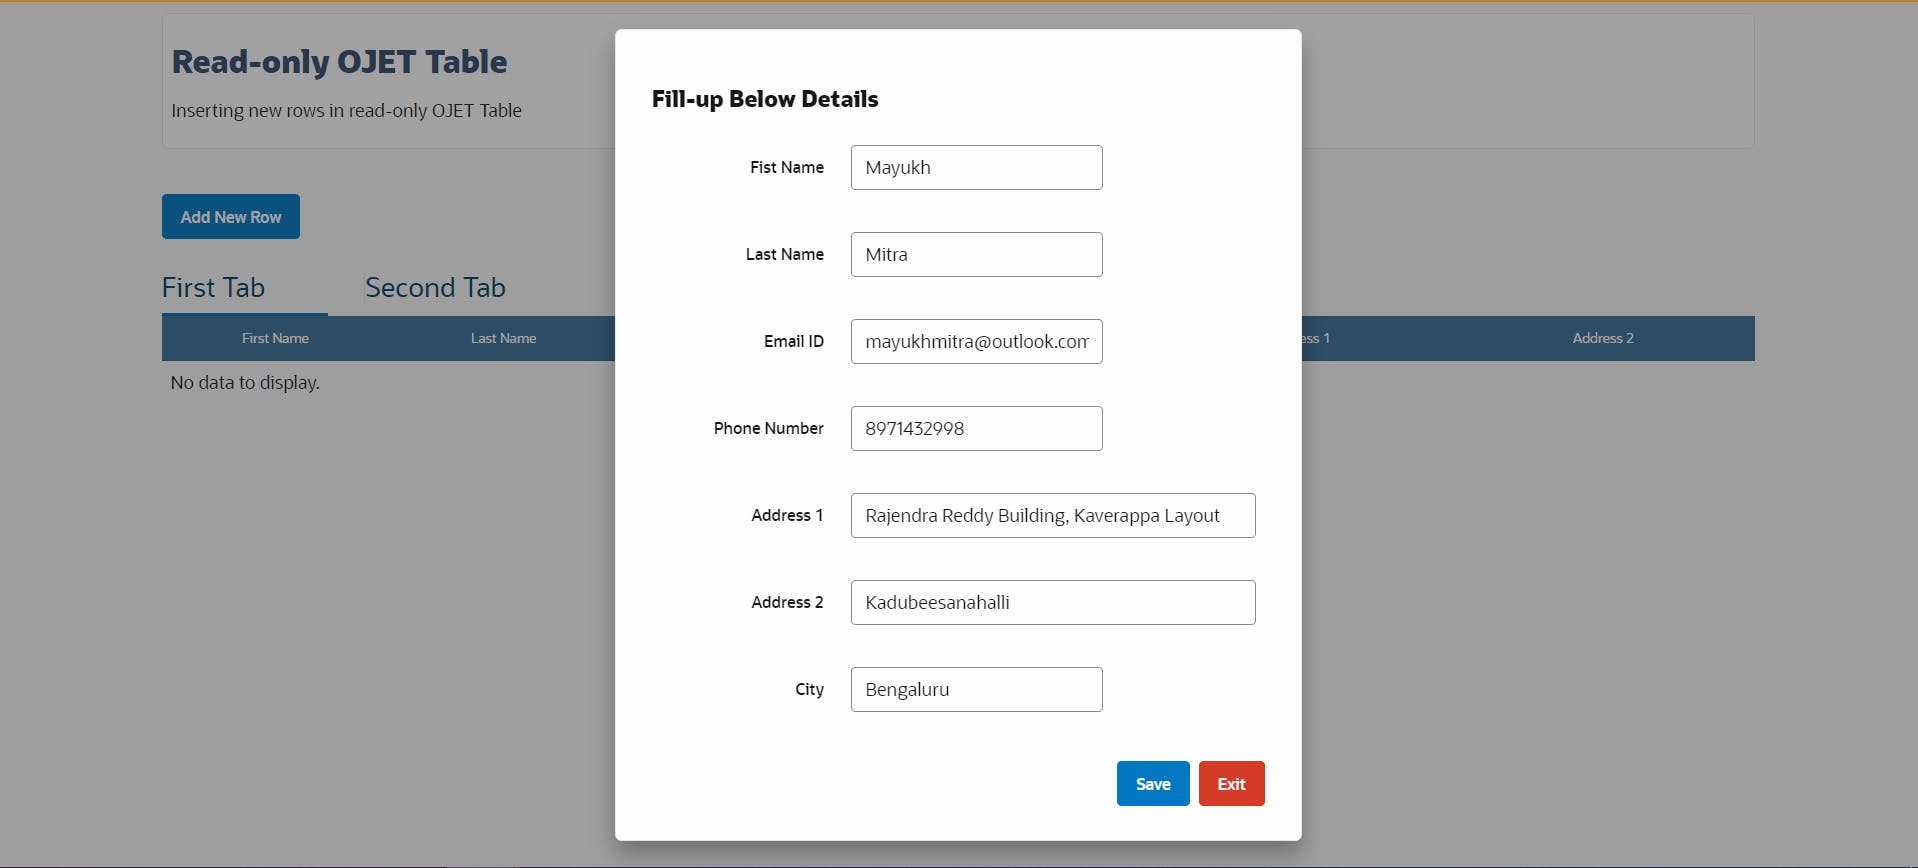
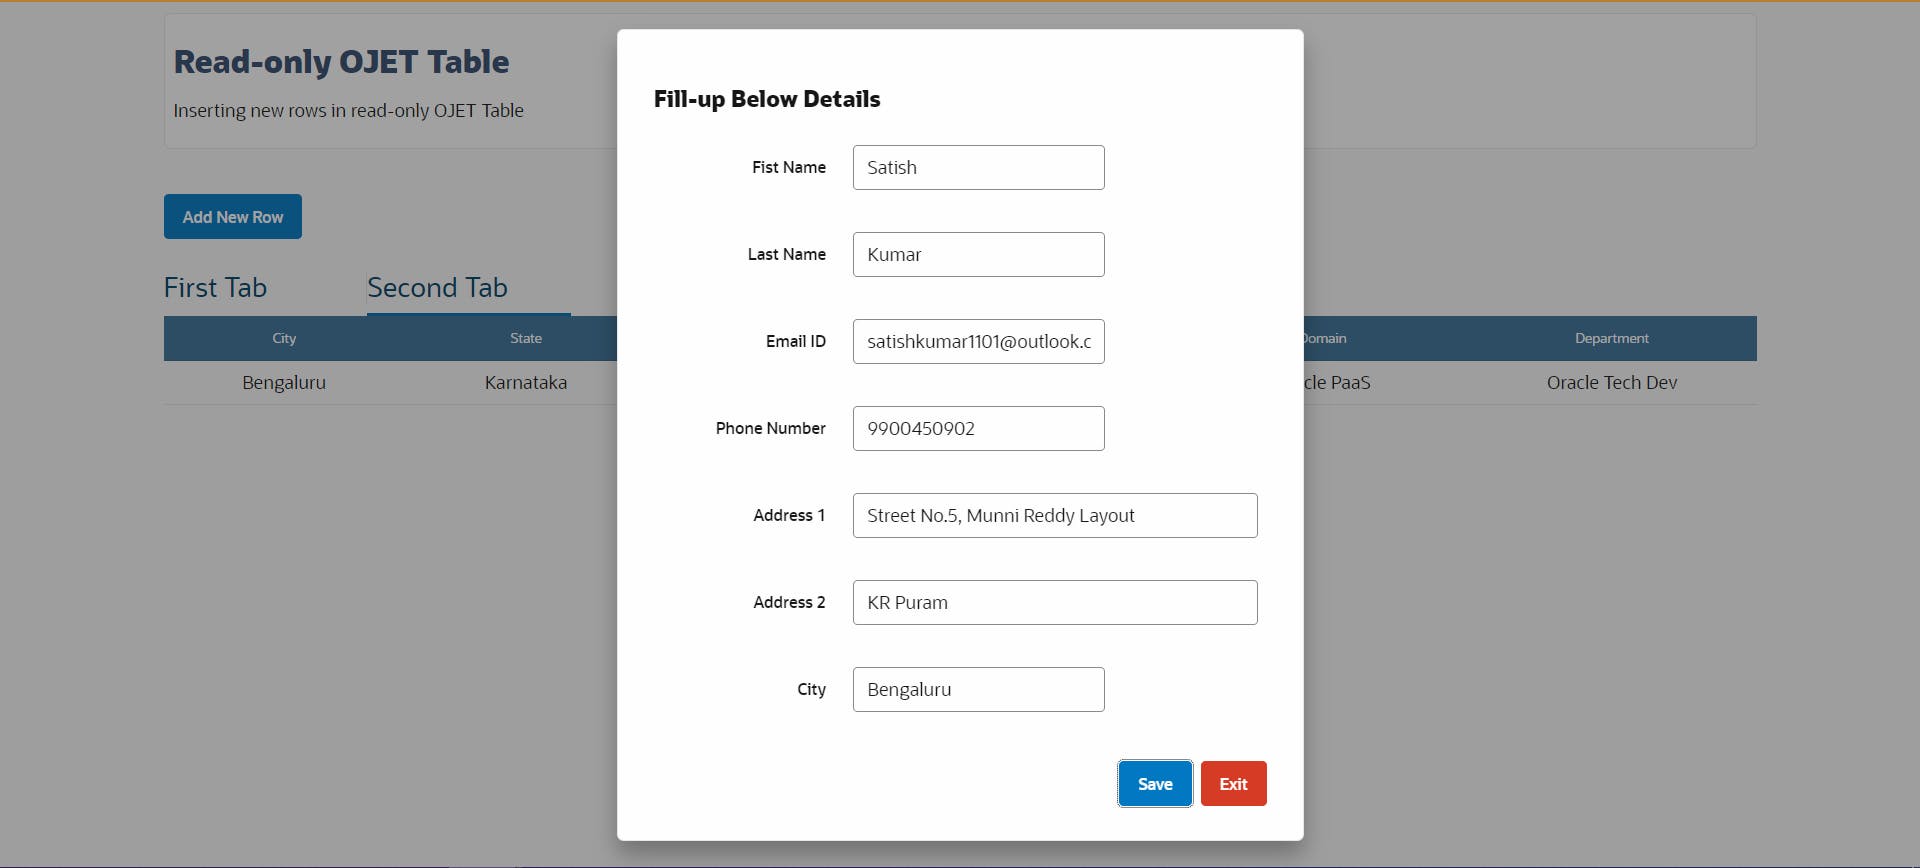
Now, we have set up our JET table, we need to do one more thing. We need to create a pop-up dialog from which we will enter new record in to table. In your page designer, add one oj-dialog component. In this dialog, we will have all input fields which we need for our table. The fields here are same as the properties/fields defined in JET table custom type above. The pop-up dialog will have two button at footer level - Save and Cancel. Once, user clicks on Save, there will be JS call which will insert record into the table. The JS code is written below.
<oj-dialog id="dialogEnterNewRow" style="display: none; width: auto" dialog-title="Enter New Details"
  resize-behavior="none" cancel-behavior="none" drag-affordance="title-bar">
  <div slot="header">
    <div style="text-align: center;">
      <h6>Fill-up Below Details</h6>
    </div>
  </div>
  <div slot="body">
    <oj-validation-group id="validationgroupNewEntry">
      <oj-form-layout direction="row" label-edge="start">
        <oj-input-text id="inputtextFirstName" label-hint="Fist Name" required="true" class="oj-form-control-width-sm"
          value="{{ $variables.varNewRowDetails.firstName }}" on-value-changed="[[$listeners.inputtextFirstNameValue]]">
        </oj-input-text>
        <oj-input-text id="inputtextLastName" label-hint="Last Name" required="true" class="oj-form-control-width-sm"
          value="{{ $variables.varNewRowDetails.lastName }}" on-value-changed="[[$listeners.inputtextLastNameValue]]">
        </oj-input-text>
        <oj-input-text virtual-keyboard="email"
          validators='[{"type":"regexp", "options":{"pattern":"([a-zA-Z0-9_\\-\\.]+)@([a-zA-Z0-9_\\-\\.]+)\\.([a-zA-Z]{2,5})", "hint":"Enter an email address.", "messageDetail": "Value must be of the form xxx@xxx.xx"}}]'
          value="{{ $variables.varNewRowDetails.emailID }}" class="oj-form-control-width-sm" required="true"
          label-hint="Email ID" id="inputtextEmailID" on-value-changed="[[$listeners.inputtextEmailIDValue]]">
        </oj-input-text>
        <oj-input-text id="inputtextPhoneNumber" label-hint="Phone Number" required="true"
          class="oj-form-control-width-sm" value="{{ $variables.varNewRowDetails.contactNumber }}"
          on-value-changed="[[$listeners.inputtextPhoneNumberValue]]"></oj-input-text>
        .
        .
        .
     <oj-form-layout>
   </oj-validation-group>
  </div>
  <div slot="footer">
    <oj-button id="buttonSaveData" chroming="callToAction" on-oj-action="[[$listeners.buttonSaveDataAction]]">Save
    </oj-button>
    <oj-button id="buttonCloseDialog" chroming="danger" on-oj-action="[[$listeners.buttonCloseDialogAction]]">Exit
    </oj-button>
  </div>
</oj-dialog>
//function to insert new row into the table
  PageModule.prototype.insertNewTableRow = function(inputResponse) {
    let returnTableArray = [], i = 0;
    inputResponse.rowID = (inputResponse.rowID ? (inputResponse.rowID + 1) : i+1);
    console.log(inputResponse);
    returnTableArray.push(inputResponse);
    return returnTableArray;
  };
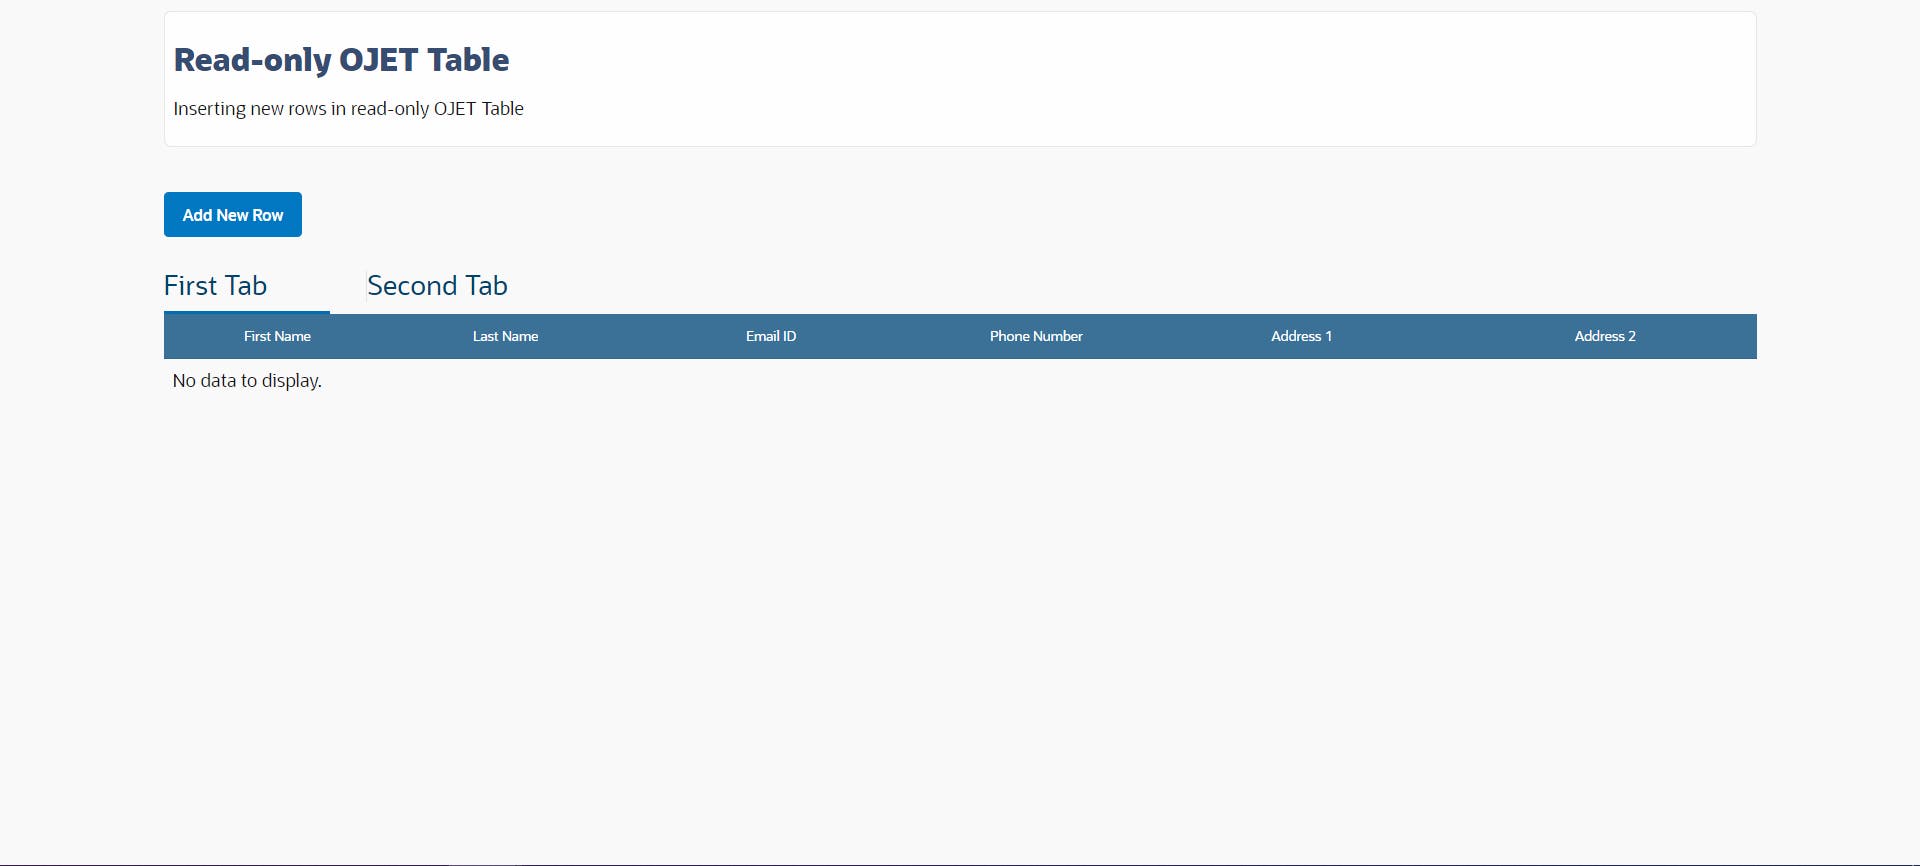
Now, that all things are set up, lets run our application and check if record is getting inserted in our table.
- Click on Add New Row button.
- Fill all the details
- Click on Save. Record gets inserted in the table.
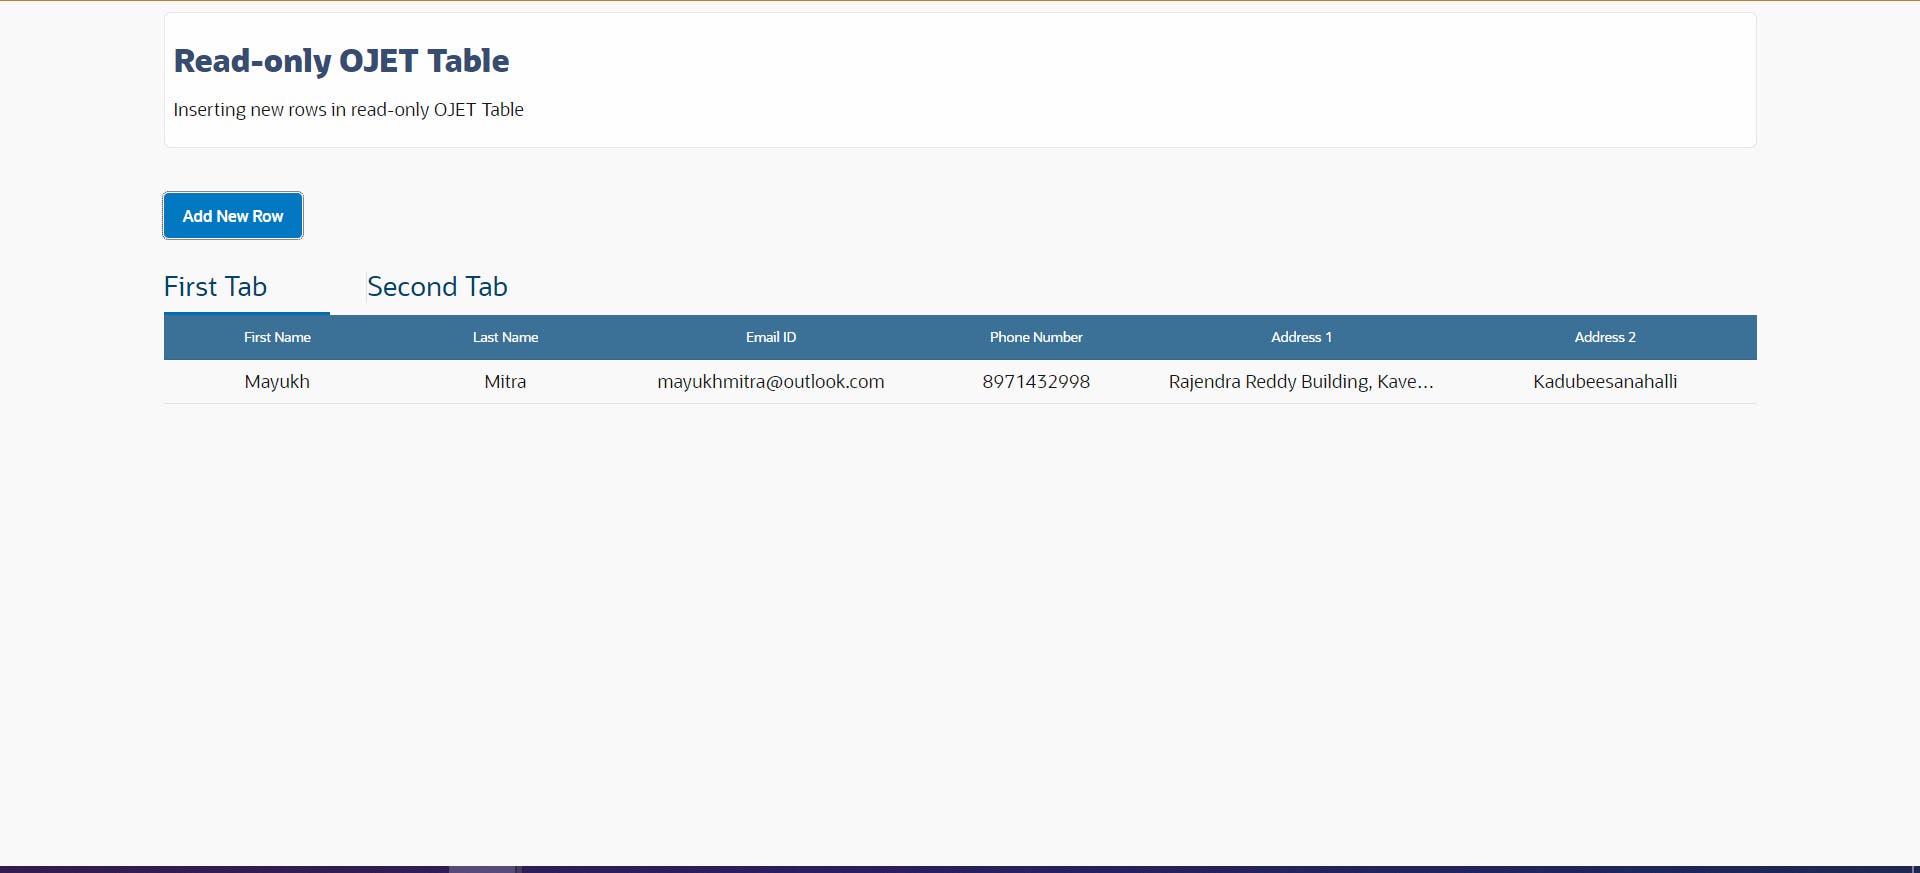
From above screenshots, it is clear that, the data we entered in pop-up dialog gets reflected in the table upon click of Save button. Let's try to insert another record.

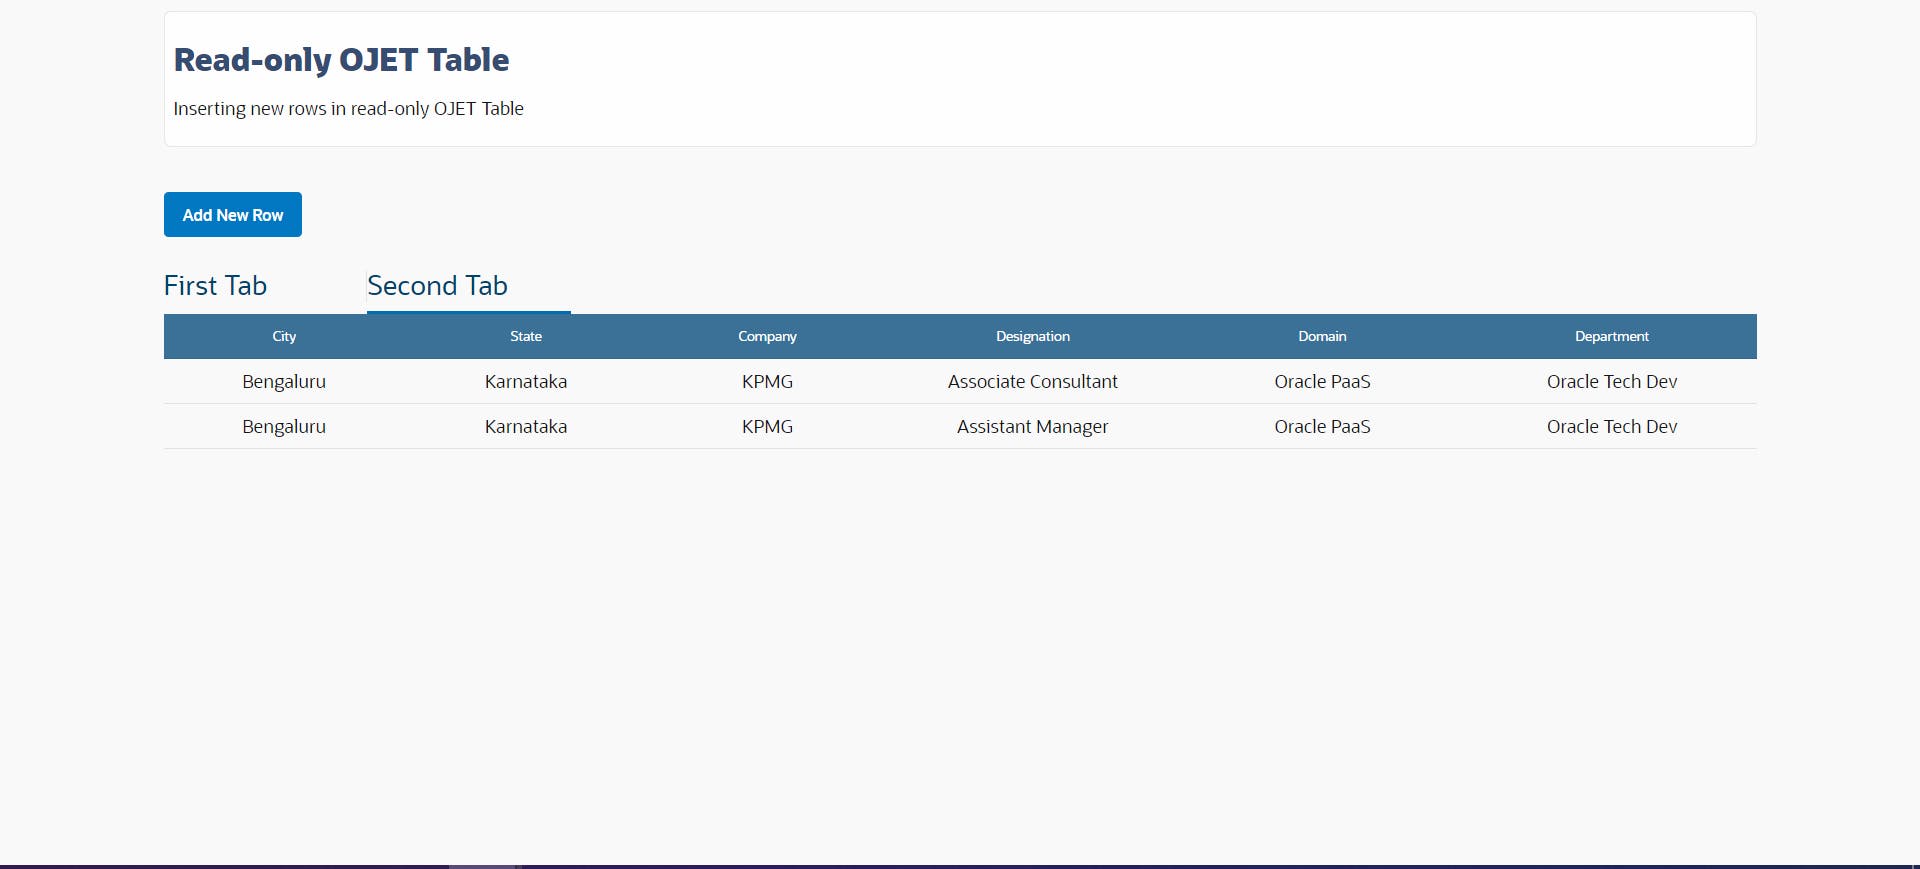
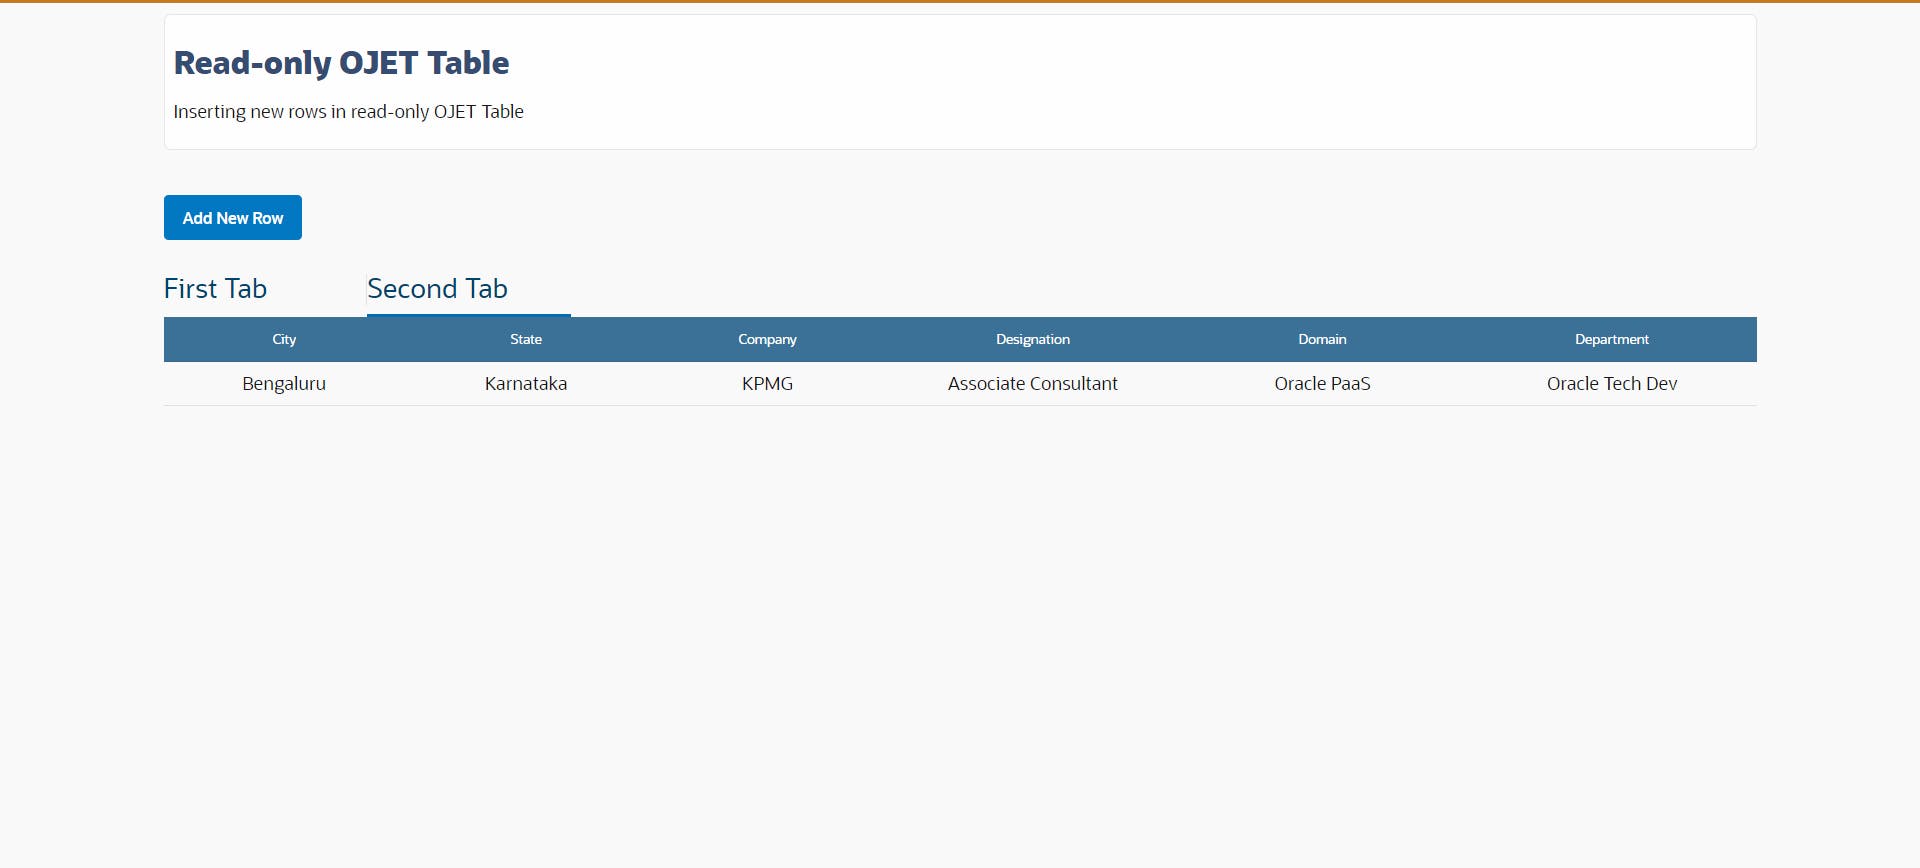
From both examples, we can see that, we are able to enter new details in read-only table without any issue. Try it from your end and let me know if it works for you.
Happy Learning :)